Peeling Paint on the Ceiling, What Can I Do?
Summary
– Focus on the causes of flaking paint on the ceiling
– Step 1: Remove peeling paint
– Step 2: Restore your ceiling
– Step 3: Apply a coat of primer to your coatings
– Step 4: Apply your finishing paint
There are several possible causes for flaking paint on the ceiling. The first is simply age, as ceilings are subject to heavy stress from floors, but there are also factors such as ambient humidity. Ceiling paint will flake more and faster than paint on the walls. So the first thing to do is to determine the cause of this paint peeling and then choose the most suitable solution.
Here’s what to do in case of peeling paint on the ceiling.
Please note: we are talking about flaking paint here, not a ceiling that is falling down with boards, including plaster and plaster. This is another story!
Focus on the causes of flaking paint on the ceiling
The following is a non-exhaustive list of the main causes of ceiling paint peeling:
– Water damage from the upper floor: water inevitably causes blistering and peeling of paint and coatings. In this case, the solution is to find out the origin of the damage and make sure that the problem is solved, then put the thing back in the hands of your insurer who will take care of restoring your ceiling (by a craftsman mandated by himself or by you).
– A bad preparation of the ceiling before painting :
◦ A finishing paint is too thick to adhere to plaster (or plasterboard). If an intermediate undercoat has not been applied, the paint is applied like a film and comes off very quickly due to a lack of adhesion.
◦ Similarly, undercoat or primer paint does not adhere to chalky plaster. These must be dry and dust-free, otherwise, the result is the same.
◦ Some old ceilings are limed (painted with lime). In this case, it is imperative to use a special undercoat primer to switch from lime to another type of paint, or to paint directly with limed oil (glycerol paint containing lime). Apart from these two solutions, no paint will adhere to the lime, which explains why it flakes.
– In damp rooms, poor quality paint can lead to peeling. Indeed, water vapor sticks to the ceiling and if the paint used is not intended for this use, it seeps under the paint and peels off. It is therefore very important for these rooms to choose a special paint for wet rooms.
– An old ceiling that is very deteriorated: if the work seems to have been well done but the paint does not hold, it is because the ceiling has more serious defects, perhaps in the upper layers of its structure or because of successive renovations. Too many layers and different materials end up permanently altering the cohesion of the support and the technical qualities of the painting no longer work properly. In this case, it is better to install a false ceiling rather than starting over twenty times over!
– The seniority, after several decades!
In any case, and putting aside the cases where the installation of a false ceiling is necessary, it is necessary to respect several successive steps to get rid of this ugly problem.
1. Remove peeling paint
First of all, anything that comes off should be knocked down. It is not necessarily a simple matter, especially with the arm up, but there is no choice! There are two solutions.
Work by hand
– Take a coating knife blade and scrape flat all affected areas, checking the entire ceiling.
– To perfect the scraping, pass your sanding block over all affected areas to remove smaller particles.
Use a sanding machine
Work:
– Either with an orbital sander;
– or with a giraffe sander, much more practical for ceilings. You can rent it (for about 70 € per day).
In this case, no need to scratch, the sander does everything (ask about the grain to be used, rather fine), but you must take a sander with a vacuum cleaner to not get all the dust in your face!
Recommendation: if your ceiling seems fragile after scraping and sanding, but you want to keep it nevertheless, do not hesitate to apply a layer of glycerol primer to stabilize it before redoing the coatings.
2. Restore your ceiling
Chances are you will have to re-coat to make up for a perfectly smooth surface unless you’ve been working with a sander. It’s up to you to check the condition of the ceiling after sanding. However, paint detachments cause only slight surface irregularities and a simple raking with a smoothing plaster should suffice if necessary.
– Spread your plaster on all damaged surfaces so that the ceiling is flat again. It is always better to work on large areas than on thin spots.
– Repeat a light sanding to complete this step.
Tip: Use a good quality, fine plaster that is easy to sand. You can also hire a plastering machine if you want to avoid too much hard work.
3. Apply a primer coat on your plaster
As we have seen, it is this step that is the key to a paint that does not flake. First dust very carefully after sanding. You cannot paint on a dusty background!
Next, apply the appropriate undercoat, depending on the substrate:
– For damp rooms, a special water-repellent primer for damp rooms or, failing that, a glycerol primer is required.
– If there is a lot of peeling, choose a glycerol print or a so-called difficult background print.
– On old whitewashed surfaces, apply a special primer for whitewashed surfaces which can then be painted with acrylic paint.
– If you have detected another type of problem with your ceiling, take an impression accordingly on the advice of your paint dealer.
– In all other classic cases, a good acrylic print on a clean, dry background is perfectly valid.
Important: print your entire ceiling even if you have not re-coated everywhere.
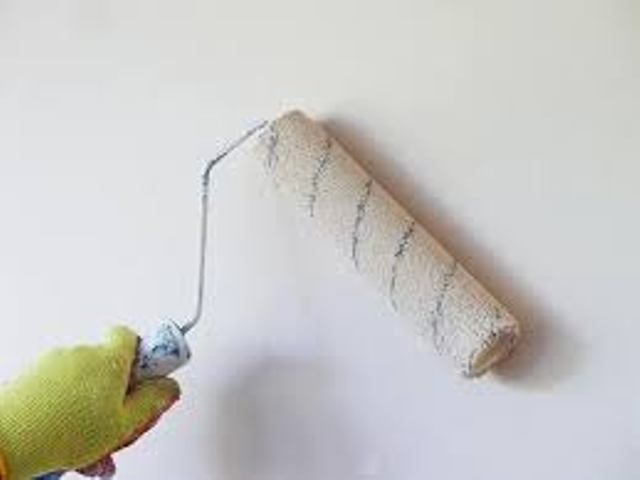
4. Apply your finishing paint
Your underlay must be perfectly dry. Follow the instructions on the product, but allow it to dry at least overnight. All you have to do is apply the finishing paint you have chosen in two coats, usually matt for ceilings.
You can apply acrylic or glycerol finishing paint on a glycerol print.
– On acrylic print, continue with acrylic paint.
– In damp rooms, your paint will preferably be glossy or satin. Otherwise, it must have characteristics that make it usable in damp rooms and washable.
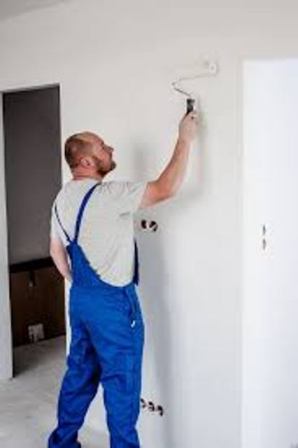
Tip: unless you can use an airless spray gun, at least think about using a pole to paint your ceilings.
If you have followed all these steps and recommendations, you should no longer be faced with flaking paint on your ceiling!
There you go, now you know how to remove peeling paint from your ceilings so you can repaint them. However, should you need help from a professional, do not hesitate to get in touch with Paint Central Florida. They are professional painters specializing in Residential Painting, Commercial Painting, Interior Painting, Exterior Painting, and One Day House Painting.
Remember to share your comments with our readers!