Summary
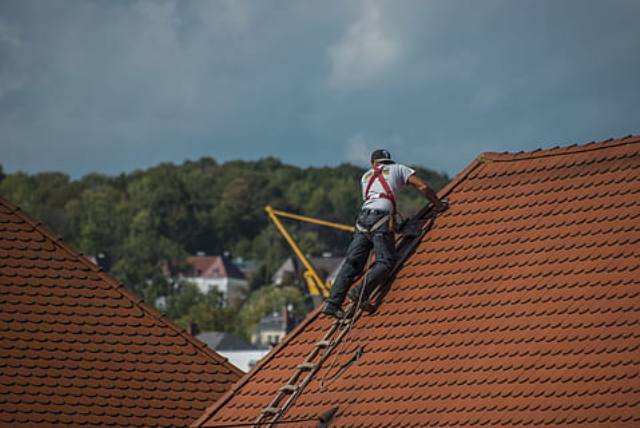
Step 1: Prepare to repair your roof
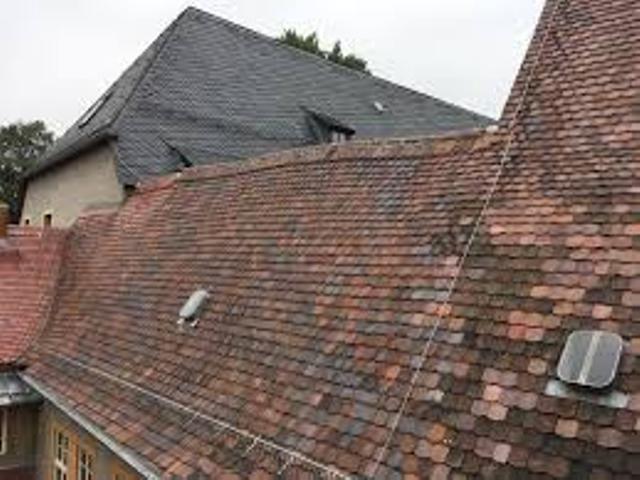
Step 2: Remove the old roof: slates or tiles
Step 3: Install new roof underlayment and battens
Step 4, Case 1: Laying a slate roof
Case 2: Laying a tile roof
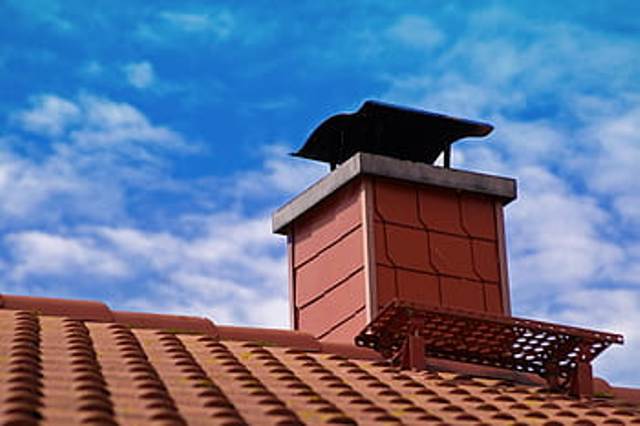
The most common roofing materials have a lifespan of several decades. Regular maintenance is essential to keep them in good condition. However, when the roof is damaged and no longer protects the house, it is necessary to change it. This can also be the case when renovating a house, in order to obtain efficient insulation and protection.
This post explains how to restore a tile or slate roof, assuming that the roof structure is in good condition or has been rebuilt from scratch.
Let’s take a look at the materials needed to restore a roof. You will need:
1. Galvanized finish staples
2. Wall stapler
3. Wooden wedge
4. Carpenter’s pencil
5. Scaffolding
6. Simple scale
7. Drill
8. Thick protective gloves
9. Hammer
10. Hammer pulls out nail
11. Silicone putty
12. Measuring tape
13. Drill
14. Multi-socket pliers
15. Rule 60 cm
16. Hacksaw
17. Screwdriver
1. Prepare to repair your roof
Take the time to study your roof: nature of the materials, installation technique and shape of the framework.
If you change the material of your roof, an authorisation may be necessary, check with the town hall to make sure you are using an authorised material.
Good to know: there is no obligation in the case of a roof refurbishment using the same material.
Assess whether you have the capacity to do this work. If you are not comfortable working at heights, call a professional!
Equip yourself to be well protected: safety helmet, closed and non-slip shoes, work pants and protective gloves.
It will take several days to restore your roof: check the weather forecast to make sure you can work in dry weather without strong winds.
When you are ready, set up your equipment for climbing to the roof (ladder or scaffolding, roof ladder).
2. Remove the old roof: slates or tiles

Important: Work in zones, ie. remove the old roofing and cover the roof zone by zone. This prevents the roof structure from being directly exposed to the weather during the construction period.
Case 1: Method for removing old slates
To remove old slates, the hook on which the slate is placed must be laid flat.
Pinch the hook with a pair of pliers.
Turn it to the side (90°) so that it lies flat.
Remove the slate so that it can be removed from the assembly.
Do the same for all slates.
Remove the hooks as you go.
Case 2: Method for removing old tiles
To lay old tiles, start at the top of the roof, removing the tiles from each other.
Raise the surrounding tiles by sliding wooden wedges.
Saw the nail holding the tile in the battens with a hacksaw.
Remove the tile.
Good to know: some tiles may not be nailed. In this case, simply remove them one by one.
3. Install a roof underlay and new battens
When repairing a roof, it is advisable to start from scratch, starting from the healthy roof structure.
Start by removing the old battens.
Staple an under-roof screen to the rafters of the roof structure.
Nail vertical battens to the rafters: 1 nail every 50 cm on the rafters, from top to bottom of the roof.
Then place the horizontal battens, which will be used to receive the slate hooks.
Calculate the spacing between the battens, called “pureau”. To calculate this important factor, use an overlap table that includes all the necessary data (e.g., height, hook size, slate size).
Good to know: use tools available on the Internet that calculate the required distance for you.
To draw the spacing of the horizontal battens, you can use a spacing gauge to the length of the overhang, which will allow you to transfer the spacing to the vertical battens.
4. Case 1: Laying a slate roof
The slate is laid from the bottom up.
Draw the markings on the frame.
Use a ruler and a carpenter’s pencil to draw all the markings.
Draw the grid for nails and slates in the lower part of the frame, called the sewer rafters.
Use a pencil to mark the locations of the hooks on the battens.
Good to know: this step can be long if the surface is large. However, it requires precision and care to ensure a perfect slate installation.
Cut the slates in the first row.
The slates on the sewer rafters must be cut to 1/3 of their height.
Mark the slate with a roofer’s hammer.
Plant the anvil in the batten and place the slate on the batten at the level of the mark.
Tap the slate at the marker point with small blows.
Good to know: you can also cut the slate with a slate cutter.
Place the first row of slates on the slate.
Nail the first row of slates to the sewer rafters, letting them protrude a few centimetres from the roof.
Important: leave a gap between the slates to nail the hooks of the second row.
Nail the hooks of the second row between the slates, aligning them with the first row of slates.
Lay the second row of slates in duplicate.
The second row of slates must be laid in duplicate (it overlaps the first): this superimposition of slates guarantees water tightness.
Insert the slates of the second row into the hooks that have been put in place.
Nail the top of the slates.
Good to know: this row of slates is held in place by hooks at the bottom of the slates and by nails at the top.
Staple the hooks of the third row to the upper battens and nail every fifth hook.
Place the following rows:
Each new row of slates partially overlaps the next row (this is the overlap). The bottom of the slates is held in a hook and the top is pinched by a hook.
Insert each slate in a hook so that it partially overlaps the previous row.
Good to know: remember to leave a space between the slates to fix the hooks of the following rows.
Staple the hooks of the following rows to the battens and nail every fifth hook.
Once all the slates have been installed, fix the roof ridge according to the instructions for the chosen model.
4. Case 2: Laying a tiled roof
Once the bedding has been completed, proceed to lay the tiles on your roof.
Lay the tiles from bottom to top.
Start laying from the low point on the left side of the roof: on the first row, lay from left to right.
Lay the tiles by interlocking them one on top of the other and shimming the tile nipples onto the battens.
Continue laying the next rows, always wedging the tile nipples on the battens.
Important: regularly check the alignment of the tiles, readjusting with your foot if necessary.
Then nail the tiles to the battens every 3 tiles, using the hole provided.
Work in zones: this will make it easier for you to move around on the roof afterwards.
Good to know: store several packs of up to 5 tiles on the roof for ease of movement.
Finish by laying the edge and ridge tiles.
Roof edge tiles are laid along the edge of the roof.
Drill the first edging tile where it will be fixed to a batten. Use a concrete drill with the percussion mode turned off.
Place the tile on the edge and screw it into the batten.
Apply silicone to the drill hole to ensure a watertight seal.
Continue laying the tile along the edge of the roof in the same way.
Once the edge tiles have been installed, install the ridge tiles on the top of the roof.
Hope the above helps you out. For more information, you can call Absolute Roof Restorations in Eastern Suburbs Melbourne. They specialise in the repair and replacement of a wide array of roof tiles.