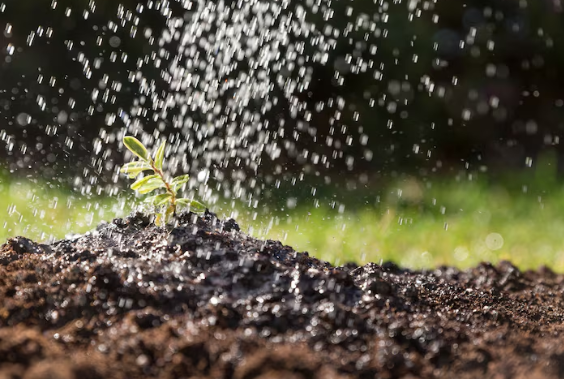
Are you tired of struggling to keep your balcony plants hydrated? Discovering how to install drip irrigation can ease your gardening woes significantly. This effortless method ensures your green companions receive steady moisture without the hassle of daily watering.
Gather Necessary Supplies
Before diving into the installation process, it’s essential to gather all the necessary supplies for your balcony’s drip irrigation system. Here’s what you’ll need:
- Main Tubing: Flexible micro tubing (typically 4/7mm) to carry water from the source to your plants.
- Adjustable Drippers: Emitters that allow you to customize the water flow for different plant needs.
- Inline Filter: A small filter to prevent clogs from debris and sediment.
- Connectors: T-connectors, elbows, and end caps to form your irrigation layout.
- Water Source: A gravity bucket, submersible pump, or tap connection to deliver water.
Design Your Layout
Mapping out your balcony’s drip irrigation layout is a vital step for ensuring efficiency and effectiveness. Consider the following factors when designing your system:
- Pot Placement: Take note of where each pot will be situated; some plants may require more water than others.
- Sun Exposure: Identify which areas receive the most sunlight to determine where watering will be necessary.
- Draining Needs: Ensure you know how each pot drains to prevent water buildup.
Sketch a Diagram
Before proceeding, sketch a diagram of your balcony to visualize your irrigation layout. This step helps in planning your tubing routes and ensuring every plant has adequate access to moisture.
Consider Water Source Placement
Decide on the placement of your water source, whether it’s a raised bucket, pump, or tap connection. Ensure it’s positioned to allow gravity to assist or is easily accessible for regular use.
Install the System Components
Once you have a well-planned layout, it’s time to install the components of your drip irrigation system. Follow these steps for a seamless setup:
Attach the Tubing
Begin by laying out the main tubing along your designated routes. Clip the tubing to secure it in place, avoiding sharp bends to maintain an optimal water flow.
Install the Filter
The next step involves installing the inline filter at the beginning of your system. This addition will help eliminate potential clogging issues down the line, ensuring continuous water flow to your pots.
Connect Drippers and Assembly
Now it’s time to add adjustable drippers to the tubing based on your plant watering requirements. Punch holes in the tubing where necessary, ensuring that each dripper is securely fitted at the correct distance from your plants.
Test and Adjust Your System
Testing your new drip irrigation system is essential to confirm everything is functioning correctly. After installation, follow these steps:
Run Water Through the System
Turn on the water source and observe the drippers. Ensure that they’re providing an adequate flow without overflow or dryness at the pot roots.
Adjust the Flow Rates
If you find some pots are receiving too much or too little water, adjust the flow rates accordingly by changing drippers or modifying the system layout. This fine-tuning ensures optimal moisture levels for each plant category.
Maintain Your Drip Irrigation System
Regular maintenance is vital for ensuring your drip irrigation system continues to operate efficiently. Consider these maintenance tips:
- Clean the Filter: Regularly clean the inline filter to prevent clogs.
- Inspect Tubing: Check tubing for leaks or damage, and replace any compromised sections immediately.
- Monitor Water Levels: Ensure that your water source remains filled, especially during dry seasons.
Seasonal Checks
As seasons change, it’s essential to adjust watering frequency and duration accordingly. During hotter months, consider more frequent watering cycles to keep your plants thriving.
Winter Preparation
Before the winter season arrives, properly winterize your system to protect it from potential damage due to freezing temperatures. Drain the tubing and store the components in a safe location until spring.
Explore More Gardening Solutions
Installing a drip irrigation system on your balcony can transform your gardening experience. For comprehensive information and expert insights on gardening, consider checking out additional resources that delve deeper into balcony gardening.
Address Common Issues
Even with an efficient setup, you might encounter some common issues as you begin using your drip irrigation system. Address these potential problems to enhance system performance:
- No Water Flow: Check for clogs in the drippers or ensure your water source is functioning correctly.
- Uneven Watering: Adjust dripper output to achieve more consistent moisture distribution across your plants.
- Excess Watering: If pots are over-saturated, reduce the watering cycle time to avoid plant stress.
Engage with Your Gardening Community
Join local gardening communities or online forums to share experiences and learn from others. Engaging with fellow balcony gardeners can provide valuable tips and generate enthusiasm for your gardening journey.
Utilize Local Resources
Make the most of local gardening centers and resources available in your area. They often offer workshops and advice tailored specifically for urban gardening challenges.
Consider Professional Assistance
If you are unsure about any steps or prefer expert guidance, don’t hesitate to seek professional assistance for your drip irrigation installation. Their knowledge can be beneficial in optimizing your system for long-term success.
Embracing a drip irrigation system on your balcony can lead to thriving plants while conserving water. Efficient watering significantly enhances plant health and simplifies your gardening experience.