Summary
Step 1: Prepare the wall before painting it
Step 2: Protect the wall surfaces you are not painting
Step 3: Prepare the paint
Step 4: Paint the corners of the walls
Step 5: Paint the wall
Step 6: Paint the baseboards
Step 7: Clean Painting Equipment
Paint can be used to protect as well as decorate a wall. The choice of paint is an important step. Before painting a wall, make sure you choose a paint that is suitable for the room or place you are painting (special facade paint, moisture-resistant paint for painting a bathroom wall, etc.).
To paint a wall, prepare it, protect the floor and the surfaces you are not painting, then paint the wall.
1.Prepare the wall before painting it
A healthy, flat and clean wall
Before painting a wall, it is necessary to prepare it so that it is clean, solid, dry and flat.
The preparation differs depending on whether the wall is made of plaster, cement, already painted, covered with tiles, or glass cloth.
If the wall is not smooth, painting will make the defects more visible. It is then advisable to start by applying a smoothing plaster.
How much paint is needed to paint a wall?

It is important to plan how much paint you will have to use to paint a wall.
To calculate the amount of paint needed:
– Calculate the surface area of the wall(s) you are going to paint.
– Calculate the amount of paint needed based on the covering power of the paint and the number of layers you will be painting.
2) Protect the wall surfaces that you are not painting
Protect the surfaces you are not painting with masking tape and tarpaulins.
– Protect the ceiling, baseboards, wall corners, door and window frames with masking tape.
Masking tape is available for straight and curved lines.
– Remove plugs and switches and protect wires with masking tape.
– Place plastic sheeting or newspaper on the floor.
Tip: Once you have painted, gently remove the masking tape before the paint has completely dried, at a 45° angle. If glue residue remains on the surface, wipe it off with a cloth soaked in solvent, taking care not to touch the painted surface with the cloth.
3) Preparing the paint
Paint is composed of several products, including pigments. Mix the paint with a stick, hand blender or electric mixer to distribute the pigments and even out the color.
– Mix evenly from the center of the can to the edges.
– Do not whip the mixture to prevent air bubbles from forming.
When the color is uniform, pour the paint into a paint tray and fill it 2/3 full.
4. Paint the corners of the walls
Start by painting the perimeter of the wall with a paintbrush. The paintbrush is a small diameter brush that is round at the base and pointed at the end. It allows you to paint places that the roller cannot reach, such as the corners of the wall and ceiling, picture rails, and the edges of windows and doors.
– Hold the paintbrush as if you were holding a pen.
– Press the brush against the wall without crushing it.
– To work accurately, press the wall with your little finger.
5. Paint the wall
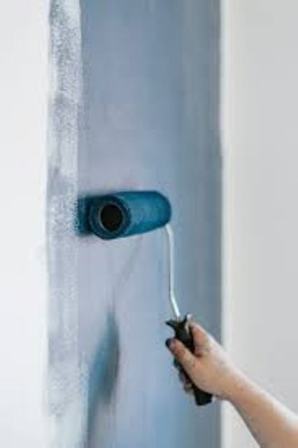
Once you have painted the corners with the paintbrush, you can paint the wall with a roller.
– Follow the direction of the light to paint the wall, the traces of the passage of the roller will not be visible once the paint dries. Start painting from the window to the door for example.
– Divide the wall into squares of 1 m (3 feet) on each side and paint them gradually.
– Paint the wall from top to bottom, applying the paint in vertical strips or “passes”.
– Cross the passes by painting horizontal strips.
– Smooth the paint by passing the roller, without loading it with paint, from bottom to top and from top to bottom.
– Once you have painted one square, paint the next.
Once you have painted the wall, let it dry before painting a second coat, following the same procedure as for the first coat.
Tip: To keep the rolls between two coats of paint without washing them and without drying them, wrap them tightly with cling film or surround them with several sheets of newspaper.
6. Paint the baseboards
Paint the baseboards with a brush.
– Place a cardboard box under the baseboard, which you will move as you paint, to avoid dripping on the floor.
– Paint the baseboards with a brush.
– Allow to dry.
7. Clean the painting equipment
Once you have finished painting, clean brushes, rollers and painting equipment.
– Painting equipment that has been used to apply acrylic, vinyl or alkyd paint can be cleaned with water.
– Glycerol, epoxy or polyurethane paint equipment can be cleaned with a suitable solvent. This solvent is indicated on the paint can.
So, that’s it! Now you know how to paint like a professional. However, the above may not always convene to all DIY enthusiasts, and this is where you can call Paint Central Florida for all your residential painting requirements.