Drip, drip, drip. There is nothing more infuriating than hearing a leaky faucet. You hear it constantly, and it reminds you of how badly you need to take care of it. Repairing a faucet is relatively easy and inexpensive, so don’t leave it hanging. Instead, use this handy guide to fix the issue.
Why is it leaking?
These may be the reasons why your faucet is leaking. Either the rubber washer or the O-rings have been worn out – over time and constant usage, they become faulty and create leaks. The leakage can occur if these two items have been installed improperly. Or, it might be that sediments have collected under the valve seat, which then corrodes the seat and cause it to leak. If you notice your faucet leaking only during certain hours during the day, then it might also be due to water pressure.
Follow these 7 simple steps:
Step 1: This is the most crucial step, be sure to close the water supply before even touching the faucet to avoid flooding. Turn the water-stop clockwise to do this; if it doesn’t budge, turn off the central water supply. Turn a tap on to check if there is no water coming out. If nothing comes out, then congratulations, you completed the first step.
Step 2: Now, you have to disassemble your faucet. This step depends on your tap, but the most common way to do this is to remove the top of the handle with the help of your trusted flathead screwdriver, which you can get at any Target and is very affordable. Having done this, you will see the screw that you’ll also need to unscrew to remove the handle. Put all the screws in a box so that you don’t lose any, which will be helpful later on when reassembling the faucet.
Step 3: Once step 2 is completed, you must inspect the remaining part to see where the issue lies. As stated earlier, be sure to check the O-rings, seal, and rubber washer.
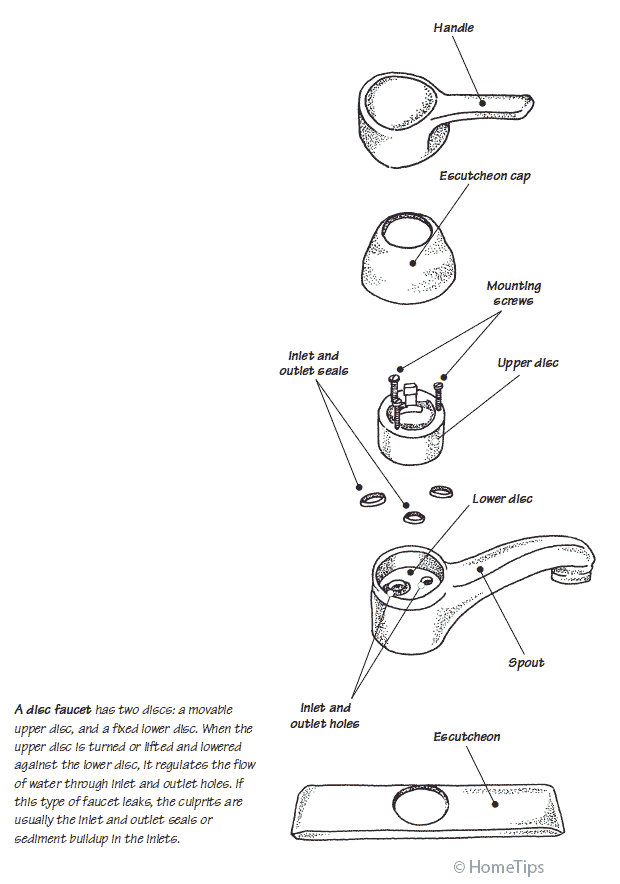
Step 4: Once you find the faulty part, you’ll need to change it. Visit your local hardware store, and I am sure they’ll be happy to help you out on your DIY journey. Be sure to bring your leaky faucet with you so that they know what’s wrong. This makes everyone’s life easier and saves you the trouble of making an unnecessary trip to the hardware store.
Step 5: Before reassembling your faucet, be sure to clean it up first. Over time, mineral and dirt amass under it and cleaning it will hopefully save you from any future trouble pertaining to this. To clean the faucet, get some vinegar and pour it all over the surface and let it sit there for 10 minutes. Wipe your entire workstation once the time is up. This not only sanitizes your station but also makes it shine, be sure to go over every nook and cranny.
Step 6: Once you’ve completed parts 4 and 5, you are almost at the finish line. You just need to install the faucet again, and this is one of the most straightforward steps and is very intuitive.
Step 7: After you’ve installed the faucet again, you just need to get the water system back on and check for any leakage. If everything seems fine, then congratulations you’ve successfully fixed a leaky faucet. This is a sign that you are doing Adulting right.
Now sit back and relax without the constant noise of water dropping. However, if the leaking continues, try contacting a plumber; maybe the problem lies elsewhere.
Sound off in the comments below if you’ll try and fix your faucet with these easy 7 steps.