How To Paint With A Spray Gun
Summary
– Which gun to choose for painting?
– A few steps before painting with a spray gun
– Step 1: Prepare the paint
– Step 2: Fill the spray gun with paint
– Step 3: Spray the paint with the gun
– Step 4: The final step
– Step 5: Clean the spray gun
Spray painting allows you to cover large areas or objects quickly, without paint marks or demarcations. The spray gun sprays the paint in fine droplets which are deposited on the surface to be painted, it can be used with most paints. Before painting with the spray gun, you will first prepare the surface so that it is smooth, dry and clean.
If you are painting a wall: the preparation of a wall differs depending on whether you are painting a plaster wall, painting a cement wall, painting a wall covered with glass cloth, non-woven paper or panelling.
To spray paint a ceiling: fill any holes and cracks and clean it.
To paint wood or aluminium: sand and clean the surface so that it is smooth.
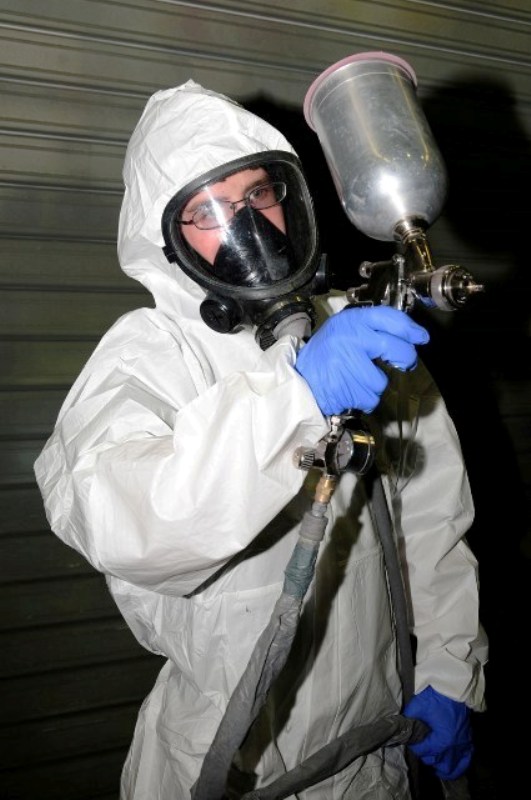
Attention: it is essential to ventilate well and wear a mask when using a spray gun indoors.
Equipment that you will need for spray painting:
– Newspaper or protective tarpaulin
– Protective mask
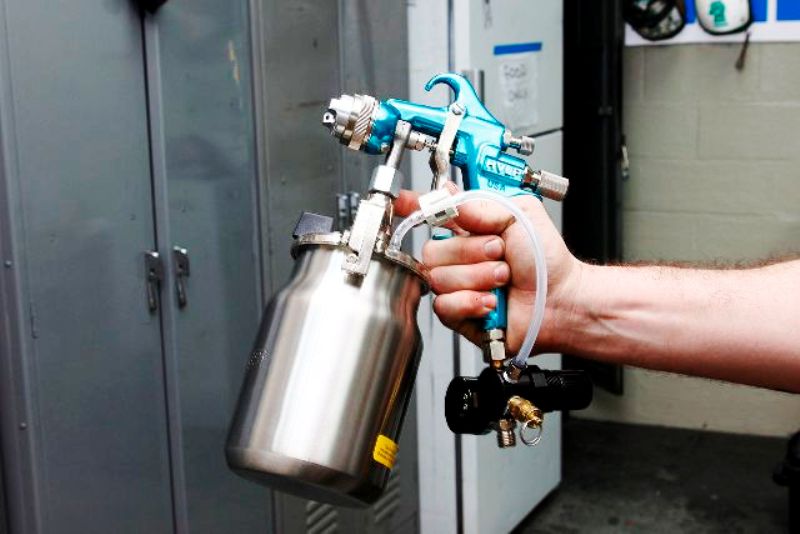
– Spray gun
– Adhesive tape
Which gun to choose for painting?
There are two types of paint spray guns, the air gun and the electric gun.
– If you are painting a large area, choose an air gun connected to a compressor.
– If you are painting a small area or small objects, choose a stun gun.
Choosing the nozzle
The tip of a stun gun is called the nozzle. There are nozzles of different diameters, which are adapted to the type of paint you wish to apply.
– If you are applying rather thick paint, choose a nozzle with a large diameter.
– If you are applying liquid paint, choose a small diameter nozzle.
A few steps before spraying paint
Precautions for spray painting
Take certain precautions when spray painting.
– If you are painting indoors, ventilate the room.
– If you are painting outdoors, check the weather beforehand.
– Wear a mask to protect yourself from fumes, especially if you are using solvent-based paint.
– Wear cotton clothing and protect your hair if you are painting a ceiling.
Protect surfaces that you are not going to spray paint
The gun sprays the paint in a mist. The paint may be deposited on furniture, objects or surfaces that are not intended to be painted.
– Protect and move furniture and objects that are not intended to be painted. Remember to protect the back and underside of furniture.
– Place newspaper or protective tarpaulins on the floor and on surfaces that are not to be painted.
– Tape down the tarpaulins if necessary.
1. Prepare for painting
Not all commercially available paints are of a consistency suitable for direct spray application. To spray paint, dilute the paint so that it is liquid enough to be dispersed.
To ensure that the paint has a good texture, check the viscosity of the mixture with a viscometer. The viscometer is a small funnel that allows you to assess the viscosity of the paint. It is supplied with the spray gun.
– Fill the viscometer with paint.
– Calculate how long it takes for the paint to run out completely.
– Check the correspondence table (supplied with the viscometer) to see if the paint is diluted correctly.
If the paint is not liquid enough, dilute it with the appropriate solvent according to the dosage indicated by the manufacturer on the paint container.
– Dilute the water paint (acrylic, vinyl or alkyd) with water.
– Dilute oil paint (glycerol, epoxy or polyurethane) with the appropriate solvent indicated by the manufacturer.
– If necessary, filter the mixture to remove lumps or small particles.
◦ Stretch a nylon stocking over a pot.
◦ Filter the paint.
– If the mixture is too liquid, add undiluted paint.
2. Fill the paint gun with paint
Once the paint is ready, fill the gun tank. Then place the spray nozzle on the gun, mount the gun and turn it on.
– Adjust the gun pressure according to the viscosity of the paint.
– Spray the paint onto a cardboard box to check and adjust the spray rate.
3. Spray the paint with the spray gun
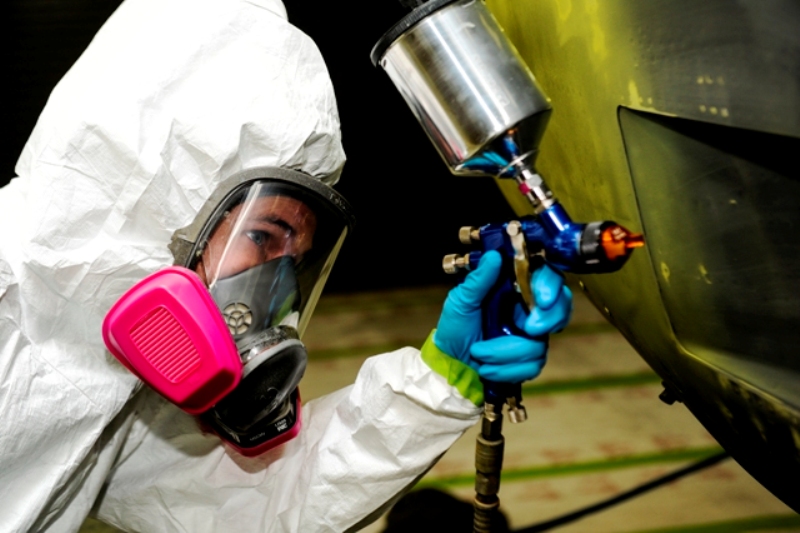
How to apply paint with a spray gun?
To paint with a spray gun correctly, hold it vertically, always at the same distance from the surface to be painted. Move it parallel to the surface when painting, taking care not to stay too long in one place so that the paint does not run.
Painting with a spray gun
Apply the paint in vertical strips.
– Move the gun vertically up and down in vertical “S” shapes.
– Make regular movements to deposit the paint evenly, do not park in the same place as long as the spray gun is running.
– Overlap the strips.
– If the area to be painted is large, divide it into square areas with 1 m sides that you will paint gradually.
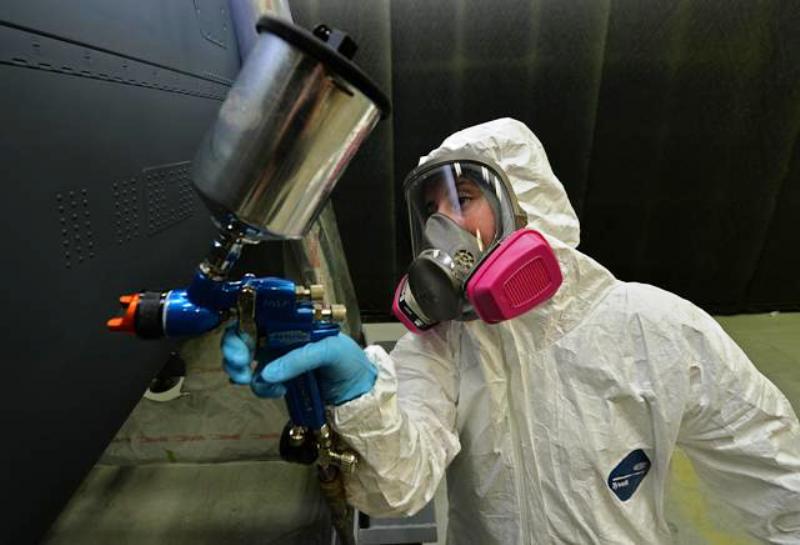
4. The final step
Once you have painted the vertical stripes, cross the passages.
– Start at the top of the surface.
– Move horizontally from right to left and then from left to right in “S” shapes.
– Overlap the strips slightly.
– If you are painting a large area, once you have finished painting one area, move on to the next one in the same manner. Overlap the areas for a uniform result.
– Allow drying for the time indicated on the package.
Note: If you need to apply a second coat, wait until the paint has dried sufficiently to paint the second coat. The waiting time before applying the second coat is indicated on the can.
5. Cleaning the spray gun
Once you have finished painting, clean the painting equipment.
Cleaning the spray gun after applying oil paint
Clean the tank, the nozzle and the outside of the gun.
– Ventilate the room if you are indoors.
– Fill the tank with the appropriate solvent (indicated on the paint can).
– Switch on the spray gun and spray the product on a cardboard box, the solvent will clean the tank and the gun circuit.
– Clean the nozzle with a brush dipped in the appropriate solvent.
– Soak a cloth with the solvent and clean the paint traces on the outside of the spray gun.
Tip: If you are cleaning a power gun, replace the solvent with Vaseline oil to clean the tank and the system.
Cleaning the gun after applying water-based paint
Clean the tank, the nozzle and the outside of the gun.
– Fill the gun tank with water.
– Spray water on a cardboard box to clean the tank and the system.
– Clean the nozzle with a brush dipped in water.
Hope the above tips will help you in painting your home interior. Should you require professional help from a painting company in Eaglemont, you can get in touch with LK Painting Service. They have over 20 years of experience and you won’t be disappointed with their level of service. Remember to leave your comments and share your experience with our readers!