Summary
– Step 1: Case 1: Install the vapour barrier film on the exterior wall
– Step 1: Case 2: Install the vapour barrier on the floor in the attic
– Step 2: Make sure the vapour barrier is waterproof
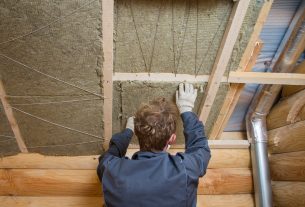
A vapour barrier membrane is a waterproofing layer for bare insulation, panels or rolls, mineral, vegetable or animal wool.
It is installed between the insulation and the substrate (floor, wall or wall), i.e. on the inside of the space to be insulated and installed without breaks or discontinuities—the installation of the vapour barrier conditions the excellent insulation of your wall.
The vapour barrier comes in the form of a translucent plastic film, often squared to facilitate cutting.
Here are the steps to follow to install a vapour barrier.
1. Case 1: Install the vapour barrier film on the exterior wall
– Unroll the vapour barrier film against the insulation.
– Use the grid marks to cut the vapour control film.
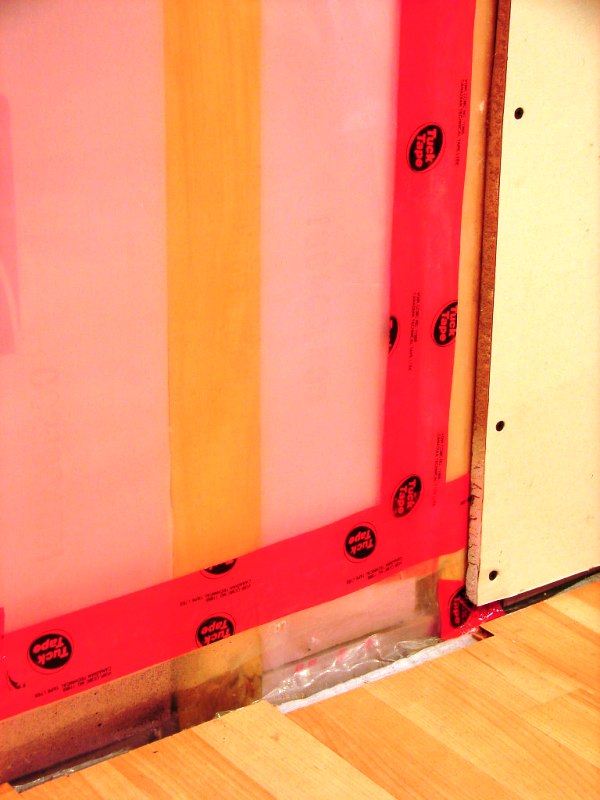
– Cut the film with scissors while it is in place and join the strips by overlapping them by 10 cm.
– Fasten it to the perimeter against the supports (framework, plasterboard, heavy walls, floor), using the most suitable fastening method: adhesive, glue or mastic or by stapling them.
– Make the joints between the strips with adhesive specially designed for this purpose.
Attention: pay particular attention to all the joints of the vapour barrier; they guarantee the excellent efficiency of the vapour barrier.
1. Case 2: Install the vapour barrier on the floor in the lost attic
Case of a flat floor:
– Unroll the vapour barrier film on the surface of the floor.
– Also, cover the eave purlin (the beam at the base of the roof slope), bringing the vapour barrier up to 10 cm.
– Overlap the strips by a minimum of 10 cm, then join them with the adhesive or by stapling them together.
– Proceed to its reassembly along the walls.
Use a suitable mastic to join it to the walls:
– Make an unbroken line of mastic on the wall at the height of 5 cm for perfect airtightness.
– Fold the vapour barrier membrane over this mastic joint without making a fold.
For exposed joists, before installing the ceiling:
– Install the vapour barrier film before installing the ceiling.
– To do this, tape it to the ceiling grid or the top of the future ceiling panel.
– Then, screw the ceiling panel (wood panel or gypsum board) through the vapour barrier film.
For exposed joists after the ceiling is installed:
– In the case of a renovation, the ceiling is already installed.
– Place the vapour barrier film on the ceiling facing, parallel to the joists.
– Overlap the strips by 10 cm.
– Under the joists, carefully seal the vapour control layer around the framing brackets with adhesive tape or adhesive grommets.
2. Carefully seal the vapour barrier
Take special care at each joint of the vapour barrier, whether it is:
– a connection between strips with the adhesive tape;
– a connection to the masonry with the appropriate mastic;
– a passage of electrical cables through an adhesive eyelet;
– a conduit passage sealed with adhesive tape.
Try not to make any folds.
Vapour Barrier Installation Equipment
|
Wall stapler |
$8 |
|
Vapour barrier installation tape |
$15/20 m approx. |
|
Adhesive tape specific to vapour barrier installation |
$12/cartridge approx. |
|
Putty |
$5 |
|
Pair of scissors |
Starting at $3 |
|
Aluminum ruler 2 m |
About $15 |
|
Specific grommet for ductwork |
$10 approx. per set of 10 |