How to Lay Tile on Wooden Floors
A parquet is a surface that can be tiled as long as it is solid, flat, clean, and remains sufficiently ventilated once the tiles are laid.
Before tiling a wooden floor, it is preferable to call a professional who will make a diagnosis and confirm if you can tile it. If the diagnosis of the floor is positive and you can tile it without risk, the first step will be to prepare it.
The preparation of the floor consists of repairing it, ensuring its flatness, sanding it to increase its adhesion, and cleaning it.
Have the wooden floor diagnosed
Laying tiles on a wooden floor is a delicate operation. Before proceeding with tiling, it is best to call a professional for a floor diagnosis.
He will determine the risk that the floor will warp due to the moisture of the glue. The risk of rotting if the tiles smother it. Indeed, the inner surface of the wooden floorboards must remain ventilated. The strength of the floor must support the weight of the tile, mainly if the room is located on the floor.
Important: Only install tiles if your floor can support them. In all cases, choose a thin tile paFloor ttern.
1. Repair broken or cracked boards
Once the floor is dry, solid and stable, you can proceed to repair any broken or cracked boards.
– Remove bent or damaged nails with a nail puller or pliers, and replace them.
– Drive-in protruding nails with a hammer.
– Locate small cracks and splits in the floor, and fill them with wood filler or multipurpose filler:
◦ Use a wider spatula than the crack you need to fill to apply the wood putty or multipurpose filler.
◦ If the crack is large, fill it with heavy twine or wood chips, then cover with the wood putty.
◦ Apply the paste or the filler in the amount necessary to fill the crack, then smooth with a spatula.
◦ Allow to cure and sand lightly with sandpaper to smooth out excess paste or filler.
2. Check the flatness of the floor to be tiled.
The floor must be perfectly flat if you want to lay tiles on it.
You can check the flatness of a floor with a 2 m aluminum ruler. Place the ruler at different points on the floor:
– If the distance between the ruler and the floor is less than or equal to 7 mm, the flatness defect is minimal. It is not necessary to correct it.
– If the gap between the ruler and the floor is greater than 7 mm, you must correct the unevenness by levelling the surface. Levelling a surface consists of covering it entirely with a specific coating to level it.
On a wooden surface, use a fibrous levelling compound.
3. Protect yourself before sanding the floor
To prepare your floor for tiling, you must sand it. You will use an electric sander for this, which requires taking precautions:
– Protect your ears from the noise of the sander by wearing headphones.
– Protect your ears from the noise of the sander by wearing a helmet. Protect yourself from the dust generated by the sander that you may inhale by wearing a mask.
– Protect your eyes by wearing safety glasses.
4. Sand the center of the surface
The floor must be sanded to allow the tile adhesive to adhere correctly.
Two types of sanders are used to sand a floor:
– the belt sander, to sand the center of the surface;
– the angle sander for sanding the corners and edges.
Start by sanding the center of the surface with the belt sander.
– Equip the sander with sandpaper or corundum paper. Start with a coarse grit to perform the sanding. The average grit size for sanding wood floors is between 80 and 120.
– Pass the sander over the floor without pressing. The weight of the sander is enough; you only need to guide it.
– Do not leave the sander running for too long in one place, as it may dig into the floor.
– Run the sander in parallel strips, turning it around each time you reach the back of the room. Be sure to cross the passes so that the entire surface is sanded. Don’t run the belt sander too close to baseboards and corners.
– Once you have sanded the entire surface with heavy grit paper, equip the sander with fine-grit paper and run it over the floor again to do the finishing touches.
5. Sanding the edges
The angle sander is small and handy, and its triangular shape makes it possible to sand spaces near baseboards and corners without damaging them.
– Equip the angle sander with grit paper or corundum paper. As with the belt sander, you’ll first use coarse grit paper and then a fine grit paper to do the finishing touches.
– Run the sander along baseboards and around corners. Don’t press or leave the sander in one place for too long.
Note: you don’t have to buy an electric sander, you can rent one.
6. Clean the floor before tiling it
Once the floor has been sanded, clean it to remove dust and particles.
– Vacuum or sweep the floor.
– Mop the floor lightly with a damp cloth to remove the last traces of dust.
– Let the floor dry.
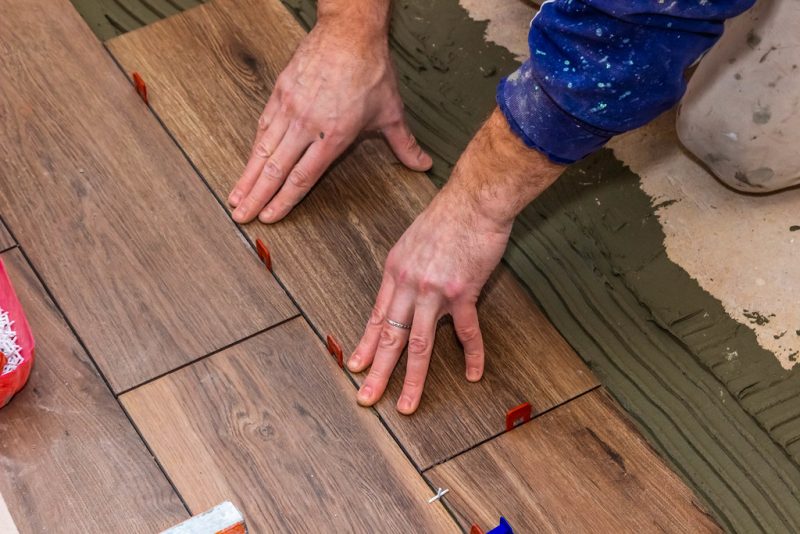
7. Lay your tiles on the floor

Once your floor is sanded and cleaned, you can tile it.
The following steps are detailed in complete sheets:
– Make the layout (calculation of the number of tiles) and make the routes before tiling the floor.
– Lay the tiles by gluing them with mortar adhesive.
– Grout the tiles.
And, when you are done, don’t forget to write a few comments below!