If you have all of the pieces – whether it’s a cracked ceramic mug, plate, bowl, spoon, tile or any other kind of pottery – the item can be repaired and look almost as good as new. The key lies in using the right adhesive. A strong sealant will dry and cure to form a strong bond, allowing you to use the item again.
So don’t throw out that broken ceramic mug because even if the handle has broken off, it can still be fixed.
Super Glue Can Be Used for Simple Repairs
 While epoxy can be used to repair ceramic, super glue is the simplest and best overall option. It’s quick, simple, and effective. Select a reputable brand, such as Gorilla Super Glue or Krazy Glue.
If you do decide to use epoxy, go with a reputable brand like JB Weld, which is easy to apply and sets quickly.
Note: When repairing ceramic that has been exposed to a lot of water or the elements, use a waterproof version of super glue.
If You’ll Be Fixing a Ceramic Mug:
Step 1: Super glue should be appliedto the crack and let dry for 1-2 minutes. If the crack has a small gap, press both sides together. Apply the super glue directly into the crack with the applicator tip. Allow the glue to get absorbed into the crack and form a bond for about 1-2 minutes.
Step 2: Wipe away any excess glue before it dries completely. Because the hairline crack is so small, there will almost certainly be some excess glue on the mug’s surface. Not to worry. Allow the glue to get absorbed into the crack for a minute or so, then wipe away any excess glue with a clean cloth so it doesn’t have a chance to fully set.
If You’ll Be Fixing a Ceramic Bowl:
Step 1: Apply adhesive to the crack’s sides and press the pieces together. You can use super glue or a two-part epoxy. If you decide to use epoxy, make sure to combine both parts according to the instructions on the package. Apply glue to the crack’s edges and then hold the broken pieces together for a few seconds to form a bond.
Note: Because the adhesive isn’t completely dry yet, don’t use the bowl right away!
Step 2: Allow the adhesive to dry before scraping away the excess. It is important to allow the adhesive to dry and harden for about 10 minutes. Then, using a metal scraper or a kitchen knife, scrape away any adhesive that has been pushed out of the crack until the surface is smooth.
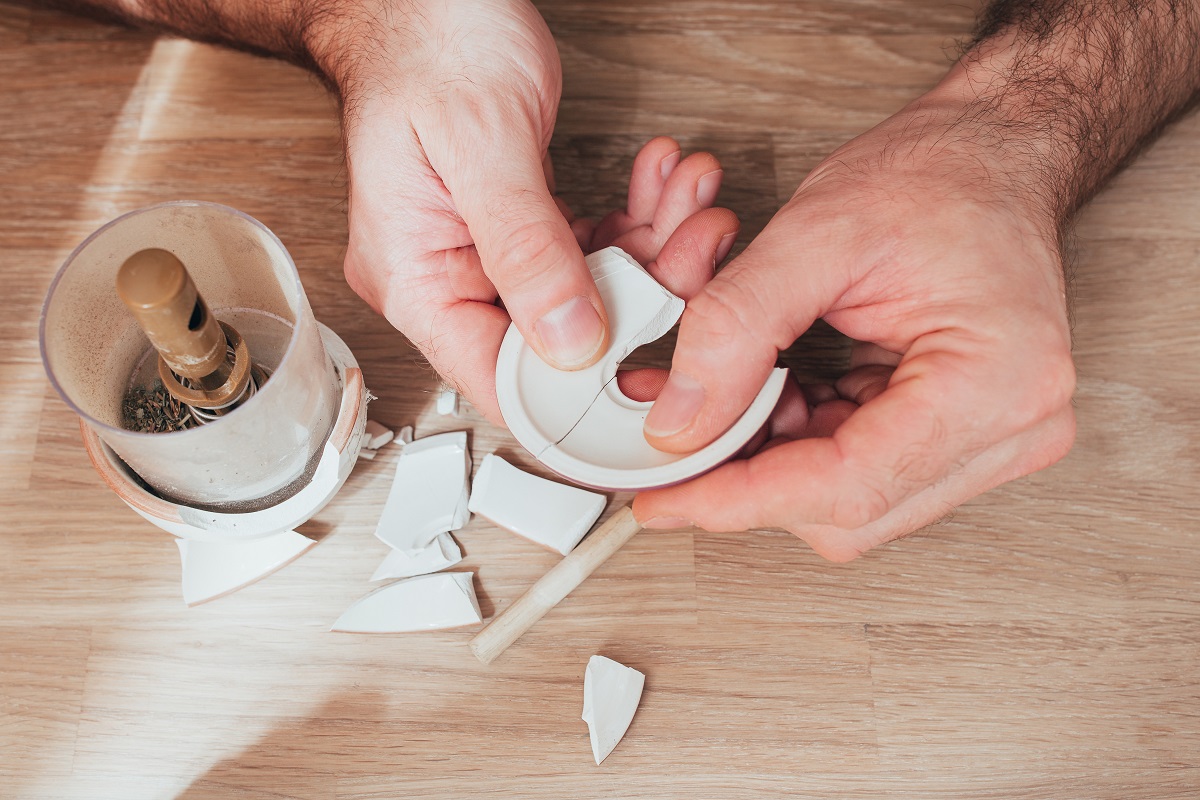
If You’ll Be Fixing a Ceramic Pottery:
Step 1: Rubbing alcohol was used to clean the pieces.
Wipe down the pottery with rubbing alcohol and a clean cloth. Get rid of any dust or dirt from the surface and scrub away any old adhesive to allow the new adhesive to bond more effectively.
Step 2: Apply 2-part epoxy to one side of the pieces and hold them together.
Mix the 2-part epoxy according to the package directions, then apply a thin layer to one side of the chipped pottery. Then, put the broken piece back into place for about a minute to allow it to bond. Epoxy is a better solution for chipped pottery than super glue because it fills in the gaps more effectively.
Step 3: Allow the epoxy to cure for an hour before scraping away the excess.
Some epoxy may leak out between the cracks when you press the chipped piece back into place. That’s fine. Let the epoxy to fully cure and harden before scraping off the excess with a razor blade.