5 Steps to Install Ceiling Panels
Contents
Step 1: Take the measurements
Step 2: Laying the battens
Step 3: Lay the first row of boards
Step 4: Lay the next rows
Step 5: Finishing touches
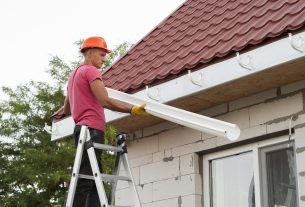
A false ceiling made of wood panelling is quite common in a renovation. It allows you to avoid repairing a roof in poor condition and even integrate insulation into this volume without great difficulty.
In the case of a wooden ceiling panel, the boards are laid perpendicularly on a framework made up of wooden strips, pieces of wood with a square or rectangular cross-section, screwed, glued or pegged to the ceiling.
Here are the steps to follow for installing ceiling panels.
Caution: Have help available and, once on the stepladder, try to adopt the most comfortable position, never work at arm’s length!
1. Take measurements
Take the dimensions of the ceiling.
Draw a plan on paper, especially if your room does not have straight walls.
Determine the direction of your panelling and deduce the direction of the battens.
Assess your needs for battens and panelling.
2. Install the battens
Choose the fixing method that is best suited to the nature of the substrate: nailed, screwed, pegged or glued.
Use a level and a ruler to check the flatness of your ceiling.
If the substrate is flat enough, you can place the strips directly.
If not, you will have to use small wooden wedges to correct a slope or a flatness defect.
Lay the first strip parallel to one of the walls at about 5 cm.
Please continue with the following strips, spacing them 60 cm apart.
Cut the battens with a jigsaw (or mini circular saw) to fit the room’s dimensions.
3. Lay the first row of boards
A board has two different profiles, one side with a tongue (male) and the other with a groove (female).
Position the first board perpendicular to the battens’ direction and against the straightest wall so that you do not start with a cut-out.
Lay it carefully, as it will serve as a guide for the following boards.
Offset it by 10 mm from the wall on its short side.
Nail the board by hammering a nail diagonally into the board’s groove on the first strip.
Do the same on each of the battens.
Finish the 1st row by:
- fixing another board in the continuity of the 1st one by the same interlocking;
- cutting the board to the size of the remaining space to be covered.
Measure the length between the installed board and the wall and deduct 10 mm.
Then transfer this measurement to an entire panel.
Cut with a jigsaw or mini circular saw.
4. Lay the next rows
Start the next row.
Use the remaining piece from the previous row:
This shifts the joints between the planks so that they look good.
You save boards.
Continue in this way until the ceiling is completely covered.
Even if the lengths of the planks appear to be the same after a few rows, take careful note of the dimensions, as the walls are never perfectly straight.
5. Finish the floor
It would help not to overlook the finishing touches. Use a quarter round rod to cover the gap between the wall and the ceiling around the room.
Cut the necessary length with a jigsaw or mini circular saw.
Fix the strip in the corner using a fastener suitable for the surface (glue or nails).
If you wish to paint, varnish or stain the panelling, wait 48 hours.
Materials for installing ceiling panels
Bevelled wooden wedges
Man head nails
Glue
Carpenter’s pencil
Step ladder
Hammer
Tape measure
Spirit level
Screwdriver
Aluminium ruler 2 m
Jigsaw
Plank
Wood screws