3 Steps to Install a Rainscreen
Summary
Before installing the main screen…
Step 1: Installing the first strip
Step 2: Installing the second strip
Step 3: Install the rest of the rainscreen
The installation of a rainscreen is essential when you are making a siding. The purpose of the rainscreen is to create a physical separation between the façade and the siding.
This separation is “breathable” and therefore not waterproof. The rainscreen is not an envelope, but protection, because it allows, thanks to its micro-perforations, to evacuate the house’s humidity.
The rain screen is sold in rolls or panels. Here is how to install a rain screen.
Before installing the rainscreen…
The preparatory work for installing a rainscreen is realizing the framework (usually wood).
The rainscreen, sold in rolls, is available in several formats and widths.
1. Install the first width
The rain screen is installed directly on the frame, from bottom to top. Follow these steps carefully:
– Measure the distance covered by the first strip and add 10 centimetres on each side to this value.
– Unroll the rainscreen on the floor, then transfer the measurement.
– Cut it with scissors or a cutter.
– Position it in one of the corners of the façade and staple it in place. Observe the 15 cm (approximately) ground clearance corresponding to the rodent screen’s height. It is also important that the vapour barrier be installed parallel to the ground.
– Unroll the rainscreen along the facade, stapling it to the framing each time it passes over the framing. This step must be done meticulously, as the rainscreen must always be tight.
– Do the same all around your facade.
Note: If you cannot tighten the rainscreen on your own, have someone help you.
2. Lay the second strip

Once the bottom part of your facade is covered, continue upwards:
– Proceed as in step 1 to measure and cut a strip of rainscreen.
– Position the second strip on top of the first. – Staple this new strip to the first strip at each batten. Some manufacturers print markings on the rainscreen to indicate the overlap area required for proper installation.
3. Install the remaining rainscreen
– Continue to the roof’s eaves to cover the entire façade with rainscreen.
– Screw wood battens onto the existing battens to complete the installation of the rainscreen and hold it in place.
Caution: If your frame is metal, you must use bolts (screw + nut) or self-drilling screws, depending on the thickness of the iron frame. If the iron is thick, self-drilling screws are not suitable. In this case, you must drill with a particular iron drill bit to secure the batten with a screw and a nut.
Materials needed to install the rain screen.
Drill
Paper + pencil
Spirit level
Wall stapler
Hammer
Scaffolding
Rain screen
Cleat
Read more:
– Home Decoration Ideas: Plasterboard;
– Preparing a Plaster Wall for Painting It;
– How to Apply a Smoothing Plaster on Your Wall;
– Building Materials and the Use of Plaster in Construction;
– How to Seal a Humid Concrete Floor?
– 6 Residential Painting Techniques;
– How to Choose the Right Paint Finish;
– Home Painting: Eliminating Paint Odor;
– How to Paint With a Spray Gun;
– Peeling Paint on the Ceiling, What Can I Do?
– 7 Steps to Install Ceiling Mouldings;
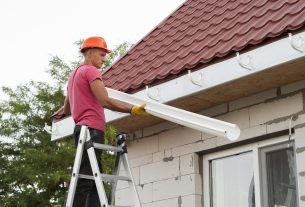
– How to Install Your Eavestrough;
– 7 Steps to Install Your Decorative Ceiling Tiles;
– How To Strip A Wooden Floor;
– 2 Easy Steps to Caulk Your Windows;
– How Waterproofing a Steel Roof Is Done;
– How to Identify a Water Leak on Your Roof?