5 Steps for Installing Slate on a Roof
Summary
– Step 1: Prepare your site
– Step 2: Mark the frame
– Step 3: Install the first row of slates
– Step 4: Lay the second row of slates
– Step 5: Lay the next rows
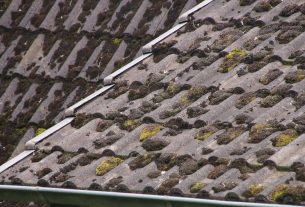
Slate is the ideal material for rainy countries. Light, waterproof and resistant, it has an incomparable lifespan compared to other roofing materials. With regular maintenance, a slate roof can easily exceed 80 years. However, it is better to be an experienced handyman to install slate on a roof.
1. Prepare your site
Slate comes in different colours and qualities depending on the region of origin.
– Prefer class A products. They limit waste and last longer.
– Check with your town hall to see if you can use slate. Roofs are subject to certain regulations depending on the geographical area.
An installed slate is divided into three parts:
– The overlap (R): surface covered by two layers of slate.
– The false eaves (F): surface covered by one slate thickness.
– The pitched roof (P): surface visible and wet by the rain.
To calculate the number of slates per square meter:
– Determine the overlap based on the roof pitch, exposure and geographic location.
– Use an overlapping chart that incorporates all the necessary data (e.g., pitch, hook size, slate size).
2. Mark out the frame
Slate is laid from the bottom up.
– Use a ruler and a carpenter’s pencil to draw all the markings.
– Mark the nail and slate grid on the eave batten (the bottom part of the frame is made of batten).
– Mark the hook locations on the battens (to ensure vertical alignment).
3. Lay the first row of slates
The first row of slates should be cut to 1/3 of their height.
– Mark the slate with a roofer’s hammer.
– Drive the anvil into the lath.
– Place the slate on the anvil at the mark.
– Tap the slate at the mark.
– Nail the first row of slates to the eave batten, leaving them a few inches above the roof.
– Leave a space between each slate to nail the second row of hooks.
– Nail the second row of hooks between the slates.
– Leave them protruding from the roof at the same level as the first row of slates.
4. Lay the second course of slates

The second course of slates should overlap the first. The slates should be overlapped to ensure a watertight seal.
– Hold the bottom of the second row of slates in place by inserting them into the hooks provided.
– Nail the top of the slates.
– Staple the third-row hooks to the top battens.
– Nail every fifth hook in place.
5. Lay the next courses
Each new row partially overlaps the next row (overlap). Each bottom slate is held in a hook, and a hook pinches each top slate.
– Insert each slate into a hook, partially overlapping the previous row.
– Leave a space between each slate to secure the hooks.
– Staple the hooks of the following rows to the battens.
– Remember to nail every fifth hook.
Read more:
- Roof Care | Installing Roof Flashing
- How To Install Your Eavestrough;
- 5 Steps To Insulate A Flat Roof;
- What Type Of Roofing Should I Choose;
- Read This Before Waterproofing Your Roof
Hope you found this post interesting. Please, jot down a few words in the comments below and let us know if you would like to read about something more specific about your roofing needs.